Scanning Documents with iPhone: A Comprehensive Guide
Scanning documents with an iPhone has become a convenient and efficient way to digitize physical documents and make them easily accessible on your mobile device. With the advancements in mobile technology, iPhones now come equipped with powerful cameras and built-in scanning features that allow users to quickly capture and convert paper documents into digital copies.
Benefits of Scanning Documents with iPhone
There are numerous benefits to scanning documents with an iPhone, including:
1. Portability: iPhones are highly portable devices that can be easily carried wherever you go. This makes it convenient to scan documents on the move, whether you’re at home, in the office, or traveling.
2. Convenience: Scanning documents with an iPhone is a quick and easy process. With just a few taps, you can capture a high-quality image of a document and convert it into a digital format.
3. Accessibility: Once scanned, documents are easily accessible on your iPhone and can be shared with others via email, messaging apps, or cloud storage.
4. Organization: Scanning documents allows you to organize and store them digitally, making it easier to find and retrieve them when needed.
5. Security: Digital documents are more secure than physical documents, as they can be password-protected and stored in encrypted formats.
How to Scan Documents with iPhone
Scanning documents with an iPhone is a straightforward process that can be completed in a few simple steps:
1. Open the Notes App: On your iPhone, open the Notes app, which is a pre-installed app on all iPhones.
2. Create a New Note: Tap the "New Note" button to create a new note.
3. Access the Document Scanner: Tap the "+" icon in the toolbar and select "Scan Documents."
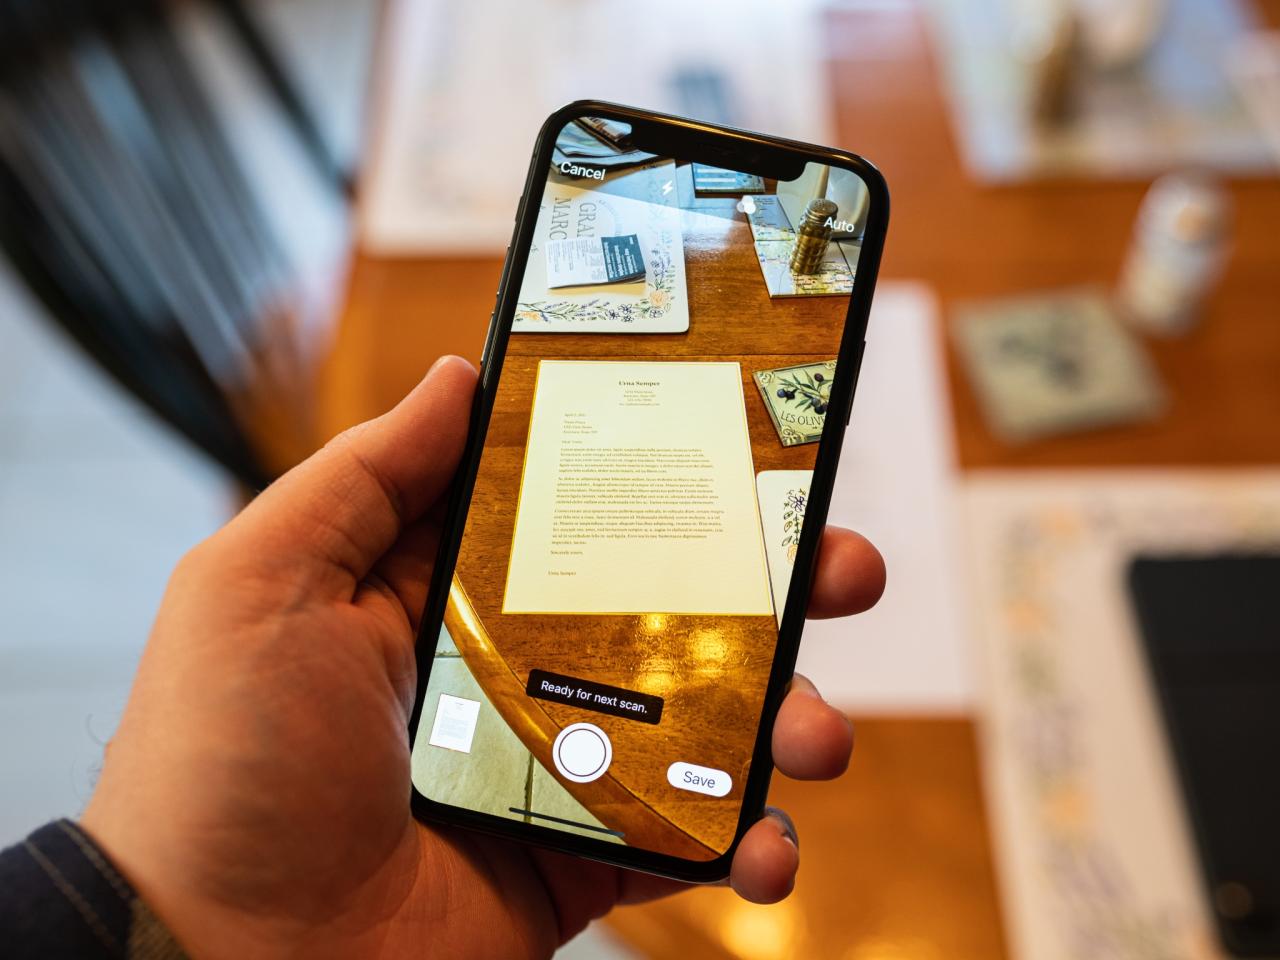
4. Position the Document: Place the document you want to scan within the frame displayed on your iPhone’s screen. Make sure the entire document is visible and well-lit.
5. Capture the Image: Tap the shutter button to capture an image of the document. You can also adjust the scan area by dragging the corners of the frame.
6. Enhance the Scan: After capturing the image, you can enhance the scan by adjusting the contrast, brightness, and color. You can also crop the image to remove unnecessary parts.
7. Save the Scan: Once you are satisfied with the scan, tap the "Save" button to save the scanned document as an image or PDF file.
8. Share or Export: After saving the scanned document, you can share it with others via email, messaging apps, or cloud storage. You can also export the document to other apps on your iPhone.
Tips for Better Scanning Results
Here are a few tips for achieving better scanning results with your iPhone:
1. Use Good Lighting: Ensure that the document is well-lit to avoid shadows and poor image quality.
2. Place the Document Flat: Make sure the document is placed flat on a stable surface to prevent blurry images.
3. Avoid Clutter: Remove any unnecessary objects or clutter from the background to ensure the document is the sole focus of the scan.
4. Steady Your Hand: Hold your iPhone steady while capturing the image to prevent blurry scans. Use a tripod or a steady surface if necessary.
5. Clean the Camera Lens: Keep the camera lens of your iPhone clean to ensure clear and sharp scans.
Recommended Apps for Scanning Documents with iPhone
In addition to the built-in scanning feature in the Notes app, there are several other highly rated apps available in the App Store that offer enhanced scanning capabilities:
1. Adobe Scan: This popular app offers advanced features like OCR (optical character recognition) for converting scanned text into editable text, multi-page scanning, and cloud integration.
2. CamScanner: CamScanner is another popular choice that provides features like automatic border detection, document enhancement, and the ability to sign and share scanned documents.
3. Evernote Scannable: This app is known for its simplicity and ease of use. It offers quick scanning, OCR, and the ability to organize your scanned documents into notebooks.
4. Microsoft Office Lens: This app from Microsoft is designed for business professionals and students. It offers features like whiteboard scanning, business card scanning, and integration with Microsoft Office apps.
5. Genius Scan: Genius Scan is a feature-rich app that offers advanced scanning modes, OCR, cloud integration, and the ability to export scanned documents in various formats.
Conclusion
Scanning documents with an iPhone is a convenient and efficient way to digitize physical documents and make them easily accessible on your mobile device. With the built-in scanning feature in the Notes app and various third-party apps available in the App Store, users have a variety of options to choose from. By following the tips and recommendations mentioned in this guide, you can achieve high-quality scans and effectively manage your digital documents using your iPhone.
Leave a Reply