How to Scan a Document: A Comprehensive Guide
Introduction
In the modern digital world, the ability to scan documents efficiently and accurately is crucial for individuals and organizations alike. Whether you need to digitize paperwork, preserve important records, or share information electronically, a scanner can be an invaluable tool. This comprehensive guide will lead you through the steps of scanning a document using various methods, ensuring high-quality results.
Selecting the Right Scanner
The first step in the scanning process is choosing the appropriate scanner for your needs. Consider the following factors:
- Document Type: Flatbed scanners are suitable for general-purpose scanning of single sheets, while document feeders can handle larger volumes of paper. For specialized needs, consider sheetfed scanners, portable scanners, or multi-function printers with scanning capabilities.
- Resolution: Measured in dots per inch (dpi), resolution determines the sharpness and clarity of the scanned image. For standard documents, 300 dpi is sufficient. However, higher resolutions (600 dpi or more) may be necessary for detailed graphics or archival purposes.
- Scanning Speed: If you frequently scan large volumes of documents, consider a scanner with a fast scanning speed. Look for models that can scan multiple pages per minute (ppm).
- Connectivity: Ensure that the scanner is compatible with your computer. Common connectivity options include USB, Wi-Fi, and Ethernet.
- Software: Some scanners come with proprietary software for managing scans and OCR (optical character recognition), which can be useful for converting scanned text into editable electronic documents.
Preparing Your Document for Scanning
Once you have selected a suitable scanner, it’s important to prepare your document properly to ensure optimal results:
- Remove Staples and Paper Clips: Staples and paper clips can damage the scanner and cause paper jams. Make sure to remove them before scanning.
- Flatten the Document: Ensure that the document is flat and free of folds or creases. This will help prevent blurry or distorted scans.
- Clean the Scanner: Dust and debris can affect the quality of the scan. Use a soft cloth to clean the scanner’s glass or platen before scanning.
- Adjust Scanner Settings: Set the appropriate resolution, color mode (black and white, grayscale, or color), and scan size. Refer to your scanner’s user manual for specific instructions.
Scanning the Document
With your document prepared and the scanner settings adjusted, you can proceed with the scanning process:
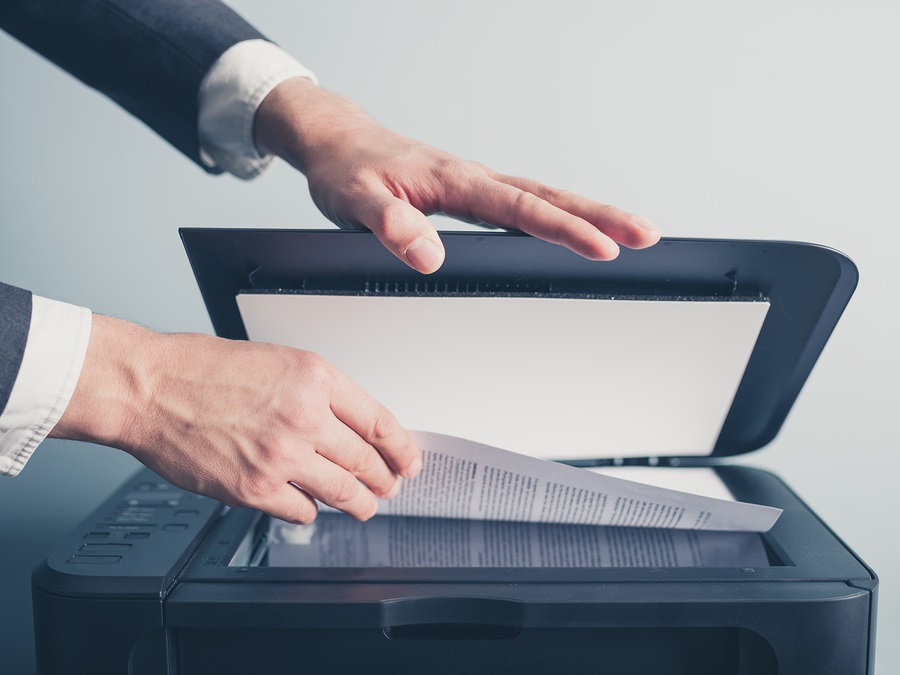
- Place the Document: Place the document face down on the scanner’s glass or in the document feeder. Make sure it is aligned properly and within the scanning area.
- Start the Scan: Initiate the scan from your computer or using the scanner’s control panel. Depending on your scanner model, you may need to select the appropriate scanning profile or destination folder.
- Preview the Scan: Once the scan is complete, preview the image on your computer to ensure it is clear and legible. Make any necessary adjustments to the scan settings and rescan if needed.
Saving and Managing Scans
After you are satisfied with the scan quality, you can save and manage the scanned documents:
- Choose a File Format: Select an appropriate file format for the scanned document. Common formats include PDF, JPEG, PNG, and TIFF. Consider the intended use of the document when choosing the file format.
- Save the Scan: Specify the destination folder where you want to save the scanned document.
- Organize and Name Files: Use a consistent naming convention and organize your scanned documents into folders to make them easy to find and retrieve.
- Use OCR Software: If you need to extract text from a scanned document, use OCR software to convert the image into editable text. This can be useful for creating searchable PDFs or editing the document’s content.
Troubleshooting Common Scanning Issues
If you encounter problems while scanning, here are some common issues and their solutions:
- Blurry or Distorted Scans: Ensure that the document is flat and properly aligned on the scanner’s glass. Clean the scanner’s glass or platen to remove dust and debris. Adjust the scanning resolution to a higher setting.
- Lines or Streaks on the Scan: Clean the scanner’s glass or platen to remove dirt or debris. Check that the document is not wrinkled or folded.
- Scanned Text Is Not Clear or Editable: Use OCR software to convert the scanned image into editable text. Ensure that the OCR software is compatible with your scanner and the document’s language.
- Scanner Not Detected by Computer: Check the USB cable or network connection between the scanner and the computer. Ensure that the scanner drivers are installed correctly. Restart both the scanner and the computer.
Conclusion
Scanning documents can be a simple and effective way to digitize paperwork, preserve records, and share information electronically. By selecting the right scanner, preparing your documents properly, and following the steps outlined in this guide, you can achieve high-quality scans that meet your needs. Remember to save and manage your scans efficiently to ensure easy access and retrieval.


